Welcome to this month’s Blogorail Yellow Loop. Today we are sharing Halloween craft ideas.
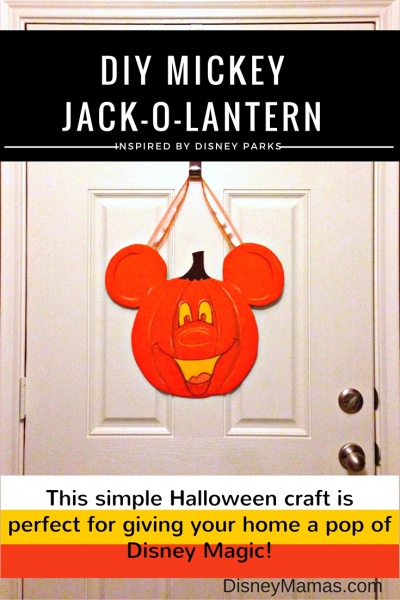
As a teacher I never get the chance to visit Disney Parks during the Halloween season, so last year I decided to bring a little bit of Mickey’s Not-So-Scary Halloween Party to our street with a Pumpkin Mickey door decoration. I’d see so many adorable pictures of the signature Mickey Jack-O-Lantern decorations at Disneyland and Walt Disney World that I can honestly say I was a bit decor-smitten with him. So, I grabbed some 1/4″ plywood, a jig saw, sandpaper, paint, sealer and a photo for reference and I got to work. I loved the result and the entire piece took me only a few hours to complete. And, if you want a more child-friendly project, you can use posterboard instead of plywood.
- Mickey Jack-O-Lanterns light up Main Street, U.S.A. in the Magic Kingdom – Photo via wdwnews.com
- HALLOWEEN TIME AT THE DISNEYLAND RESORT – Photo via disneylandnews.com
First things first, please don’t be intimidated by the jig saw! I teach high school technical theatre, and as such I teach teens to use jig saws all the time. Believe me, if they can do it so can you! So, go out to your local hardware store and pick up a jig saw of your own. If you are at all into crafting you will develop a love for it! Do a little research and find one that suits your needs.
Okay, that’s out-of-the-way. On with the post.
Start with a piece of 1/4″ plywood that is roughly 2 feet by 2 feet. Using a photo as reference, lightly sketch the pumpkin shape on to the wood (I recommend a piece of vine charcoal, but a pencil will work too). If you aren’t great at drawing circles find something around the house to use as templates for the face and ears, and then adjust the shape as necessary. Once you are satisfied with your drawing use your jig saw to carefully cut the outer shape out. Be sure to always cut away from you, and watch the placement of the jig saw cord and your supporting hand. Once he is all cut out sand the piece well so that you have a smooth surface for painting (don’t forget the edges). You can use an electric palm sander, or you can wrap a piece of sandpaper around a scrap of wood and do it that way. When sanding work in a circular pattern. If you are making this out of paper instead of plywood just draw your Mickey onto the paper and cut it out.
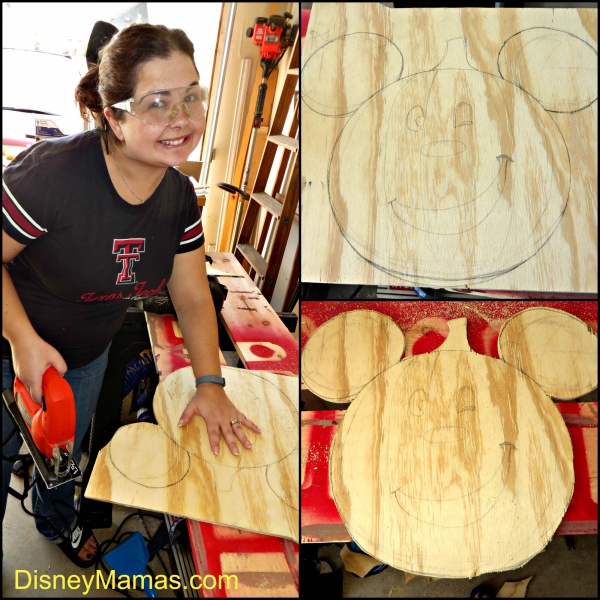
Now sketch in the face if you haven’t already and prepare to paint! I used acrylic craft paints purchased at an art supply store. They are more viscous than standard acrylic paints and house paints, are much less expensive. I picked up an orange, yellow, white, black and brown for this project, as well as a black paint pen. Paint the entire piece orange to start and allow it to dry. Generally the pencil outlining Mickey’s face will still show through the first layer of paint, but you may need to darken the drawing. Give the wood several coats of the orange paint until you are satisfied with the appearance. Next, use your yellow paint to fill in the eyes and mouth, and outline the nose, of your Mickey Jack-O-Lantern. Add additional coats of yellow until you have achieved the desires coverage. Outline the facial features with a black or dark brown fine tip paint pen, and use a narrow brush to add white highlights to make your Mickey Jack-O-Lantern appear a bit more realistic and dimensional. Paint the stem brown adding black and white to create highlights and shadows. Once you are satisfied with your paint job use a sealer for outdoor use to seal in your paint and make your Mickey Jack-O-Lantern more weather resistant. For the paper version, you can then either draw the face directly on the paper, or use another piece of paper, cut them out, and glue them in place.
Add hanging hardware to your Mickey Jack-O-Lantern and suspend him on your front door in whatever manner you wish! A paper version should be laminated, and then attached to the door using painters tape.
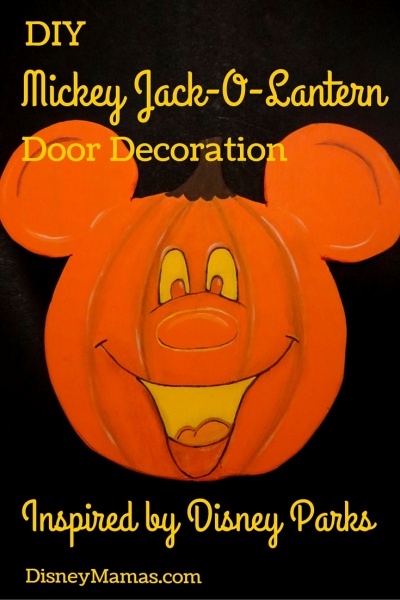
There you have it! A simple way to bring a little Disney Magic to your Halloween decorations! If you create a Mickey Jack-O-Lantern door decoration please stop by our Facebook page and share a picture of your work, or tag us on Instagram at @DisneyMamaLin
check out the other great posts from the Blogorail!
Here is the map of our Magical Blogorail Yellow | Halloween Crafts Loop:
- 1st Stop – Saving Up for Disney | Mickey Pumpkin Appliquéd Halloween Tee”
- 2nd Stop – Disney Mamas | Mickey Jack-O-Lantern Door Decoration Inspired by Disney Parks
- 3rd Stop – Capturing Magical Memories | Mickey Glow Stick Spider Classroom Gifts
- 4th Stop – The Delightful Life | Quick & Easy Halloween Crafts for All Ages
- 5th Stop – Home is Where the Mouse Is | #DisneySide Tombstones





Look at you with your jigsaw! I agree, it’s one of the most useful and overlooked tools for crafting, along with the dremel. 🙂 Your finished product looks so cute!
I love my dremel too! I just bought a new one to use on our pumpkins this year! Thank you!
Very cute!! I do admit to be nervous around power tools 😉 I’d love to see a picture of your design on the front door!
And I totally have a picture of it hanging to put up! Our front door is under a deck so the lighting is wacky and I need to get it into photoshop to work on that, then I’ll post it!
Great project for a decoration you can use year after year. Did you consider using a lighter material or attaching something on the back (furniture pads?) since this would hang on your door?
I love working with 1×4″ plywood. It doesn’t warp the way masonite and luan do, and it holds paint very well. I may wind up adding something to be back, as it does bounce on the door a bit, but haven’t gotten around to it yet with the new baby!
Love it! Super cute!
Thank you!
Glad to see another crafter that has a fondness for the jigsaw. I am always amazed at what you can whip out! And thanks for the painting tips. I am not good at that part.
The jig saw is MAGIC! I’m all about painting, so if you ever have any questions don’t hesistate to ask.
Pingback: Disney Inspired Halloween Crafts Ideas